A reliable power setup is crucial for a comfortable and enjoyable caravanning experience. Whether you’re venturing off-grid or staying at a powered site, having a dependable source of electricity ensures that you can run essential appliances, stay connected, and enjoy modern conveniences.
Understanding Your Power Needs
Before setting up a battery and solar power system for your caravan, it’s essential to understand your power needs. Accurately assessing your energy consumption will help you choose the right components and ensure that your system meets your requirements, especially when staying in free camps without power.
Assessing Your Energy Consumption
To determine your power needs, start by listing all the appliances and devices you plan to use in your caravan. Consider items such as:
- Lighting: LED lights, reading lamps
- Refrigeration: Fridge, freezer
- Cooking Appliances: Microwave, induction cooktop
- Entertainment: TV, radio, laptop, charging devices
- Climate Control: Fans, air conditioning units
- Water Systems: Water pump, water heater
Next, find out the power consumption (in watts) of each appliance. This information is usually available on the appliance label or in the user manual. Once you have the power consumption for each appliance, estimate the number of hours each appliance will be used per day. Multiply the power consumption by the number of hours to get the daily energy usage in watt-hours (Wh) for each appliance. Sum up the daily energy usage of all appliances to get the total daily energy consumption.
Example Calculation:
- LED Light: 10 watts, used for 5 hours/day = 50 Wh/day
- Fridge: 50 watts, running for 24 hours/day (cycling on and off) = 1200 Wh/day
- Laptop: 60 watts, used for 3 hours/day = 180 Wh/day
Total daily energy consumption = 50 Wh + 1200 Wh + 180 Wh = 1430 Wh/day
Determining the Appropriate Battery Capacity
Batteries store energy in amp-hours (Ah). To choose the right battery capacity, you need to ensure that your batteries can provide enough energy to meet your daily needs. For a simple estimate, divide your total daily energy consumption by the voltage of your battery system (usually 12V for caravans).
Example Calculation:
- Total daily energy consumption: 1430 Wh
- Battery system voltage: 12V
Required battery capacity = 1430 Wh / 12V = approximately 120 Ah
This means you need a battery capacity of at least 120 Ah to meet your daily energy needs. However, to ensure you don’t fully discharge your batteries (which can shorten their lifespan), it’s wise to have a capacity that is about 20-30% higher than your calculated requirement.
Example Adjustment:
Required capacity with 30% margin = 120 Ah x 1.3 = approximately 156 Ah
So, you would look for a battery setup that provides at least 156 Ah of capacity.
By accurately assessing your power needs and calculating the appropriate battery capacity, you can ensure that your caravan’s electrical system will be reliable and sufficient for your travel requirements. This foundational step sets the stage for selecting the right batteries and solar components to power your adventures, particularly when staying in free camps without access to mains electricity.
Choosing the right battery for your caravan is crucial for ensuring reliable power, especially when staying in free camps without access to mains electricity. Here’s an overview of the different types of batteries and how to configure them for optimal performance.
Battery Types
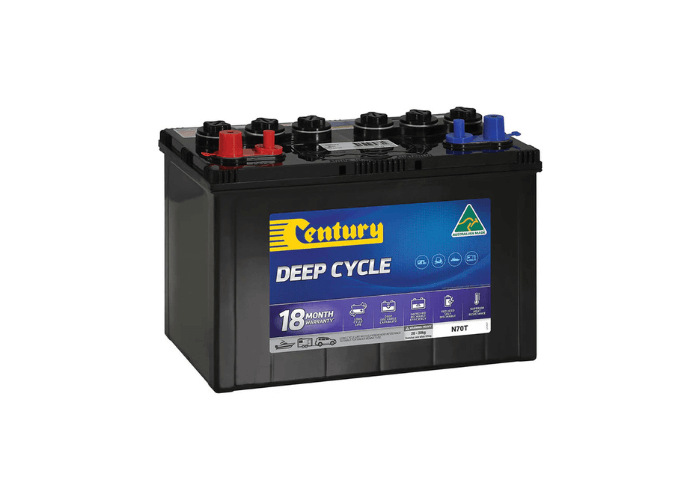
Lead-Acid Batteries
Century Deep Cycle Battery
$259.00
The Century Deep Cycle Battery N70T is a powerhouse solution for Big Lap adventurers, providing reliable energy for caravans and campers. Designed for sustained use, it’s perfect for keeping your essential appliances and devices powered throughout long stretches on the road.
Pros
- Extended power supply: Delivers consistent power over prolonged periods, ideal for off-grid camping.
- Low-maintenance: Built to last with minimal care, offering peace of mind on long trips.
- Wide compatibility: Works seamlessly with various 12V appliances like lights, fridges, and more.
Cons
- Bulky: Adds considerable weight to your caravan setup.
- Higher price point: Comes at a premium, but its durability and performance make it a solid investment.

AGM (Absorbent Glass Mat) Batteries
Fullriver AGM Deep Cycle Battery
Price varies by model
The Fullriver DC Series Deep Cycle Battery is designed for heavy-duty, long-lasting performance, making it a trusted option for caravanners and campers who need reliable off-grid power. This battery series is maintenance-free and built to withstand demanding conditions, ensuring you have consistent energy during your Big Lap adventure.
Pros
- Maintenance-free: No need for regular water refills or other upkeep, allowing for hassle-free operation.
- Durable design: Built to handle rugged environments, making it ideal for off-road and remote locations.
- Long life span: Offers a longer service life compared to standard batteries, providing excellent value for extended trips.
Cons
- Higher initial cost: Premium price, but worth it for serious off-grid travelers.
- Heavy: Adds significant weight to your caravan or camper setup.
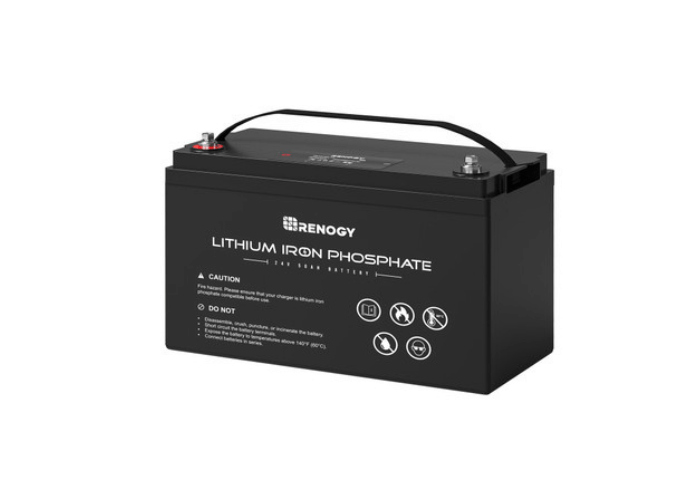
Lithium-Ion Batteries
Renogy Lithium Iron Phosphate Battery
$300.00
The Renogy 12V 50Ah Core Series Deep Cycle Lithium Iron Phosphate Battery offers a reliable, lightweight, and long-lasting power solution for those venturing on the Big Lap. This lithium battery is designed for optimal off-grid energy storage, providing dependable power for caravanners who need a portable energy source.
Pros
- Lightweight: At just over 6.5kg, it’s significantly lighter than traditional deep cycle batteries, reducing overall load.
- Long lifespan: Delivers more cycles and lasts longer than standard lead-acid batteries.
- Fast charging: Lithium technology enables faster charging, ensuring quicker energy replenishment for your off-grid adventures.
- Safe and stable: Built-in safety features like overcharge, short circuit, and over-discharge protection.
Cons
- Higher upfront cost: While it provides long-term value, the initial investment is more expensive compared to lead-acid batteries.
- Lower capacity: May not suit those with larger energy needs, requiring additional units for high-demand setups.
Configuring Your Battery Set-Up
Single vs. Multiple Batteries
Single Battery Setup: A single battery setup is simpler and easier to manage. It’s suitable for caravans with modest energy needs or for those who are just starting out.
Multiple Battery Setup: Using multiple batteries can provide more capacity and longer periods of power without recharging. This setup is ideal for caravanners with higher energy demands or for extended off-grid stays.
Series vs. Parallel Configurations
Series Configuration: Connecting batteries in series increases the voltage while keeping the same capacity (amp-hours). For example, connecting two 12V batteries in series will give you 24V, but the amp-hour capacity remains the same as a single battery.
Parallel Configuration: Connecting batteries in parallel increases the capacity (amp-hours) while keeping the voltage the same. For example, connecting two 12V batteries in parallel will give you double the amp-hour capacity while maintaining 12V.
Example Configuration:
- Series: Two 12V, 100Ah batteries in series = 24V, 100Ah
- Parallel: Two 12V, 100Ah batteries in parallel = 12V, 200Ah
Choosing the Right Configuration:
- Series Configuration: Best if you need higher voltage for specific appliances or systems.
- Parallel Configuration: Best if you need more capacity to run your devices for longer periods.
Tips for Battery Maintenance and Safety:
- Regular Checks: Regularly inspect your batteries for signs of wear, corrosion, or damage.
- Proper Ventilation: Ensure your battery storage area is well-ventilated to prevent the buildup of gases, especially for lead-acid and AGM batteries.
- Use a Battery Monitor: A battery monitor helps you keep track of your battery’s charge level, voltage, and overall health, ensuring you never run out of power unexpectedly.
By choosing the right type of battery and configuring them properly, you can create a robust and reliable power setup for your caravan, ensuring you stay powered up even in the most remote free camps.
Solar System Components
A complete solar power system for your caravan involves several key components, each playing a crucial role in ensuring efficient energy production, storage, and usage. Understanding these components will help you design and maintain an effective solar setup for your travels.
Key Components of a Solar Power System
Solar Panels: Solar panels are the primary components that capture sunlight and convert it into electricity. As discussed in Section 3, you can choose from monocrystalline, polycrystalline, or flexible panels based on your needs.
Charge Controllers: Charge controllers regulate the voltage and current coming from the solar panels to the batteries. They ensure that the batteries are charged efficiently and prevent overcharging, which can damage the batteries.
- PWM (Pulse Width Modulation) Controllers: These are simpler and less expensive but slightly less efficient.
- MPPT (Maximum Power Point Tracking) Controllers: These are more efficient, especially in varying weather conditions, and can extract more power from the solar panels.
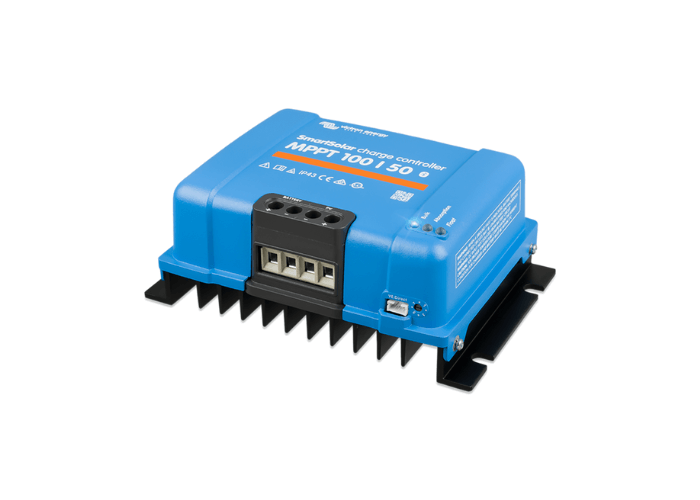
Maximum Power Point Tracking
Victron SmartSolar MPPT 100/30
$362.99
The SmartSolar MPPT 100/30 Solar Charge Controller is an essential piece of gear for anyone relying on solar energy during their travels. Designed to maximize the efficiency of solar panels, this controller uses Maximum Power Point Tracking (MPPT) technology to ensure you’re getting the most out of your solar setup. It’s ideal for caravanners who need consistent power while off-grid.
Pros
- Efficient solar harvesting: MPPT technology tracks the optimal voltage and output from solar panels, increasing efficiency, especially during cloudy conditions.
- Remote monitoring: Bluetooth connectivity allows real-time monitoring and adjustments through a smartphone app.
- Wide range of compatibility: Works with both 12V and 24V battery systems, adding flexibility to your setup.
- Built-in safety features: Offers protection from overcharging, overheating, and reverse polarity, ensuring long-term safety and performance.
Cons
- Installation required: Some users may need professional assistance to install the unit correctly.
- Pricey for casual use: Not the most budget-friendly option for campers with minimal energy needs.
Inverters
Inverters convert the DC (direct current) power stored in the batteries to AC (alternating current) power, which is used by most household appliances. There are two main types of inverters:
- Pure Sine Wave Inverters: These provide clean and stable power, suitable for all types of appliances.
- Modified Sine Wave Inverters: These are cheaper but may not be compatible with all appliances and can cause them to run less efficiently.
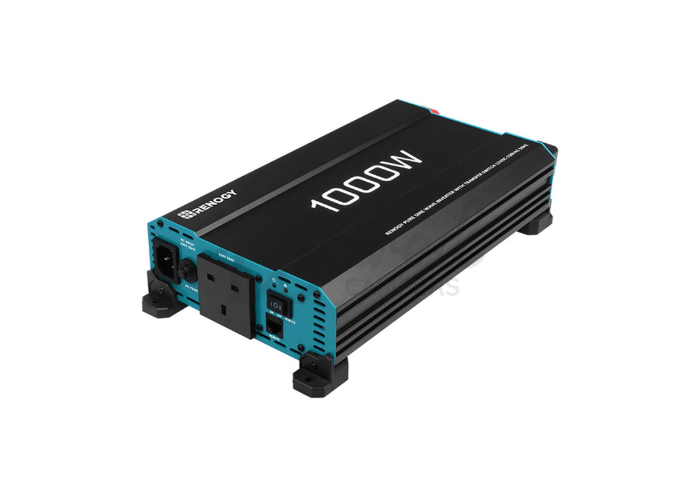
Modified Sine Wave Inverters
Renogy 2000W Pure Sine Wave Inverter (with UPS Function)
$332.00
The Renogy 2000W Pure Sine Wave Inverter with UPS Function is a high-performance inverter that converts 12V DC power into 230V/240V AC power, making it ideal for caravanners and campers who need reliable access to household appliances on the road. It also features an Uninterruptible Power Supply (UPS) function, ensuring a smooth transition between power sources in case of outages or disruptions.
Pros
- UPS Function: Automatically switches between battery and external power sources to prevent downtime, ensuring continuous power for essential devices.
- High power output: With 2000W, it can power larger appliances such as microwaves, fridges, and even some air conditioners, making it versatile for all types of setups.
- Pure sine wave output: Provides clean, stable electricity, ensuring sensitive electronics like laptops and medical equipment run smoothly without risk of damage.
- Multiple safety features: Equipped with overload, overheat, and short circuit protections, making it a safe choice for long-term use.
Cons
- Higher price point: Its advanced features and power capacity come with a cost, which might be excessive for those with more modest power needs.
- Requires proper installation: Some users may need professional help for installation to ensure optimal and safe operation.
Modified Sine Wave Inverters
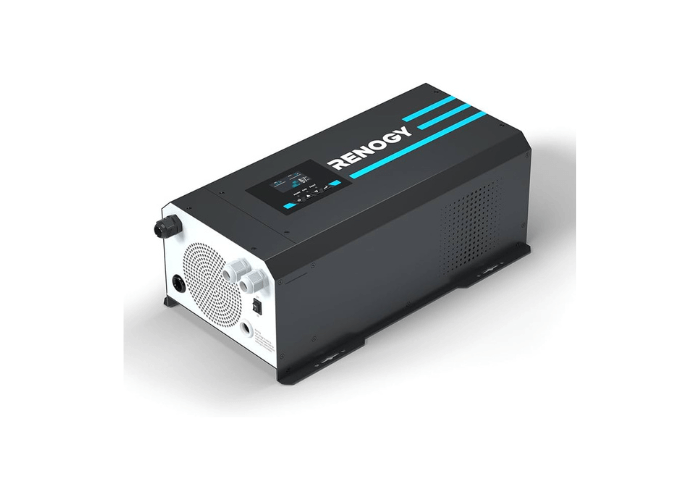
Renogy 2000W 12V Pure Sine Wave Inverter Charger with LCD
$719.00
The Renogy 2000W Pure Sine Wave Inverter Charger is a versatile piece of equipment that not only converts 12V DC power into 230V/240V AC but also functions as a battery charger. Its LCD screen provides real-time data and control, making it an ideal choice for campers, caravanners, and off-grid users looking for a reliable and high-performance power solution.
Pros
- Multi-functionality: Combines an inverter and charger in one unit, allowing you to convert power and charge batteries simultaneously.
- LCD display: Provides real-time monitoring of battery status, load levels, and inverter output for precise control and easy troubleshooting.
- Advanced charging options: Built-in 3-stage battery charging ensures safe and efficient recharging of batteries, prolonging their lifespan.
- Durable design: Made to withstand rugged conditions, perfect for off-road and outdoor use.
Cons
- Premium price: The multi-functional design and advanced features come at a higher cost, which may not be ideal for those on a tight budget.
- Complex installation: Due to its advanced capabilities, proper setup and configuration may require professional assistance or a deep understanding of electrical systems.
Battery Monitors
Battery monitors help you keep track of your battery’s state of charge, voltage, current, and overall health. This information is crucial for managing your energy consumption and ensuring your batteries are always in good condition.
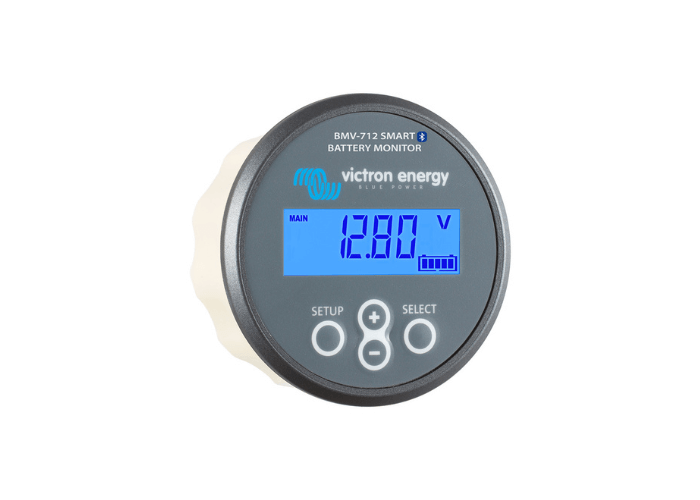
Victron BMV-712 Smart Battery Monitor
$332.49
The Victron Energy BMV-712 is a highly advanced battery monitor designed to give you precise control over your battery system. Featuring Bluetooth connectivity, it allows real-time monitoring via a smartphone app, offering insights into voltage, current, and temperature. It’s a reliable choice for ensuring your battery remains in peak condition, especially for off-grid or camping setups.
Pros
- Bluetooth connectivity for smartphone monitoring
- Accurate battery status with detailed data
- Programmable alarm to prevent deep discharge
- Easy installation with user-friendly setup
Cons
- Higher price point compared to simpler models
- Limited to 12V/24V systems without additional components
How Each Component Works and Their Importance
Solar Panels:
The solar panels capture sunlight and convert it into DC electricity. The efficiency and number of panels determine how much power you can generate.
Charge Controllers:
Charge controllers manage the flow of electricity from the panels to the batteries, ensuring that the batteries are charged efficiently and protected from overcharging. MPPT controllers are particularly effective in optimizing the power output from the panels.
Inverters:
Inverters are essential for converting the stored DC power in the batteries to AC power, allowing you to use standard household appliances in your caravan. Pure sine wave inverters provide the best performance and compatibility.
Battery Monitors:
Battery monitors are crucial for keeping an eye on your battery’s health and performance. They provide real-time data, helping you manage your energy usage and prevent issues such as over-discharge, which can damage the batteries.
By understanding and properly integrating these components, you can create a robust and efficient solar power system for your caravan. This setup will ensure that you have a reliable source of power, enhancing your ability to stay off-grid and enjoy your travels without the constant need for external power sources.
Installation Tips and Considerations
Installing a solar power system on your caravan involves careful planning and attention to detail. Here are some key tips and considerations to ensure a successful and efficient installation.
Installing Solar Panels on Your Caravan
Optimal Placement for Maximum Efficiency:
- Roof Space: Utilize the available roof space effectively. Place panels where they will receive maximum sunlight exposure throughout the day.
- Angle and Orientation: Mount the panels at an angle that optimizes sunlight capture, typically facing north in the southern hemisphere and south in the northern hemisphere. Adjustable mounts can help you optimize the angle based on your location and season.
Mounting Options and Techniques:
- Fixed Mounts: These are permanently attached to the roof and are the most common and cost-effective option. They require minimal maintenance but lack adjustability.
- Tilt Mounts: These allow you to adjust the angle of the panels to capture more sunlight. They can improve efficiency but may require more maintenance.
- Portable Mounts: Portable panels can be set up on the ground or any other convenient location. They are versatile and can be moved to the best sun exposure areas but need to be stored and set up each time you camp.
Wiring and Connecting Your Solar System
Safety Tips and Best Practices:
- Use Proper Cables: Ensure that you use cables rated for solar installations. These cables should be UV-resistant and suitable for outdoor use.
- Fuse Protection: Install fuses or circuit breakers between the panels and the charge controller, and between the charge controller and the batteries, to protect against electrical faults.
- Cable Management: Secure and protect all cables to prevent damage from weather, movement, or pests. Use cable ties, conduits, and grommets where necessary.
Ensuring Compatibility Between Components:
- Voltage Matching: Ensure that the voltage of the solar panels matches the voltage of the battery bank and the charge controller. Most systems operate on 12V, 24V, or 48V.
- Capacity Matching: Ensure that the charge controller can handle the current produced by the solar panels. Check the amp rating of both to avoid overloading.
- Inverter Compatibility: Ensure that the inverter’s capacity matches or exceeds the total wattage of the appliances you intend to run simultaneously.
Step-by-Step Installation Guide:
Plan Your Layout:
- Measure your roof space and plan where each panel will be mounted.
- Plan the routing of cables from the panels to the charge controller, batteries, and inverter.
Mount the Solar Panels:
- Clean the roof surface where the panels will be mounted.
- Attach the mounting brackets to the panels.
- Secure the panels to the roof using appropriate screws and sealants to prevent leaks.
Install the Charge Controller:
- Mount the charge controller close to the battery bank, ideally in a well-ventilated area.
- Connect the solar panel cables to the charge controller.
Connect the Batteries:
- Connect the charge controller to the battery bank using suitable cables and connectors.
- Ensure all connections are tight and secure.
Install the Inverter:
- Mount the inverter near the battery bank but in a well-ventilated area to prevent overheating.
- Connect the inverter to the battery bank using appropriately rated cables.
Test the System:
- Double-check all connections.
- Turn on the charge controller and inverter.
- Monitor the system to ensure it is working correctly and efficiently.
By following these installation tips and considerations, you can set up a solar power system that is both efficient and reliable. Proper installation ensures maximum power generation, safety, and longevity of your system, allowing you to enjoy the benefits of off-grid living in your caravan.

Comment (0)